free Worldwide shipping - try 30 days risk-free
Seiko modding tools guide: customize your watch with confidence

Customizing your Seiko watch can transform it into a unique timepiece that reflects your personal style, but many hobbyists struggle with tool selection and proper techniques. Without the right guidance, you risk damaging delicate components or achieving disappointing results. This comprehensive guide walks you through essential modding tools, workspace preparation, step-by-step procedures, and troubleshooting tips to help you confidently personalize your Seiko watch. Whether you’re planning your first dial swap or a complete case modification, you’ll learn exactly what tools you need and how to use them effectively for professional-quality results.
Table of Contents
- Key takeaways
- Essential tools and materials for Seiko modding
- Preparing your workspace and watch for modding
- Step-by-step guide to using Seiko modding tools
- Troubleshooting common modding issues and verifying results
- Explore custom Seiko watches and modding services
- FAQ
Key Takeaways
| Point | Details |
|---|---|
| Right tools matter | Using high quality purpose built tools prevents damage and yields professional results during Seiko modding. |
| Invest in quality tools | Professional grade tools maintain tolerances and save money by preventing damaged parts. |
| Genuine replacement parts | Genuine replacement parts should be used, and compatibility with your model must be carefully verified. |
| Use a complete mod kit | Purchase a full kit from reputable suppliers to ensure component compatibility and include instructional materials. |
Essential tools and materials for Seiko modding
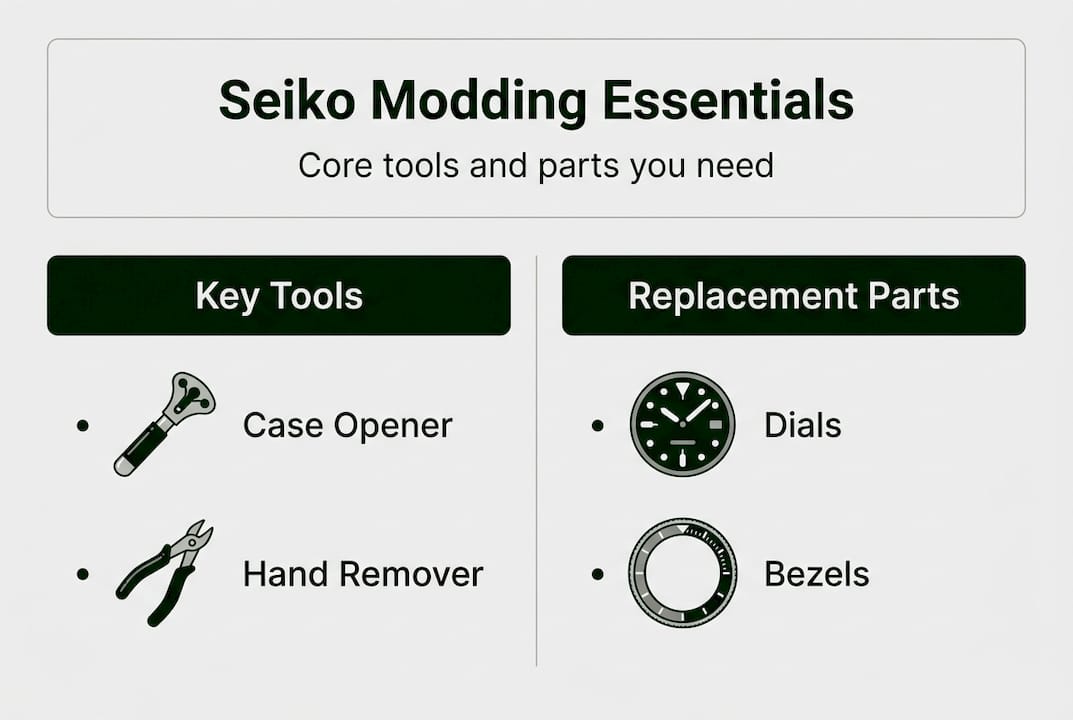
Successful watch customization starts with having the correct tools for each task. Quality equipment protects your investment and makes modifications significantly easier. A comprehensive list of tools needed includes case openers, hand removers, dial protectors, and spring bar tools that form the foundation of any modding toolkit.
Your basic toolkit should include a case opener for accessing the movement, either a ball or knife-style depending on your case back type. Hand removers with proper leverage points prevent dial damage when removing hour, minute, and seconds hands. Precision screwdrivers in multiple sizes handle case screws and movement holders without stripping threads. A spring bar tool with both fork and pin ends removes bracelets and straps safely. Dial protectors, often made of thin plastic, shield the dial surface during hand removal operations.
Quality matters significantly in modding tools. Cheap screwdrivers strip screws, inferior hand removers scratch dials, and poorly machined case openers slip and gouge cases. Investing in Swiss-made or Japanese precision tools costs more initially but saves money by preventing damaged parts. Professional-grade tools maintain their tolerances through dozens of modifications, while budget alternatives often fail after just a few uses.
| Tool | Primary function | Typical cost range |
|---|---|---|
| Case opener | Removes case back to access movement | $15-$80 |
| Hand remover set | Lifts hands without dial contact | $20-$60 |
| Precision screwdriver set | Handles various case and movement screws | $25-$100 |
| Spring bar tool | Removes and installs straps/bracelets | $10-$30 |
| Dial protectors | Shields dial during hand removal | $5-$15 |
| Crystal press | Installs replacement crystals evenly | $40-$150 |
| Rodico putty | Removes dust and fingerprints | $8-$15 |
Beyond basic tools, you’ll need genuine replacement parts for your specific Seiko model. Aftermarket dials, hands, bezels, and crystals vary in quality, so research compatibility carefully. Understanding Seiko modding essentials helps you identify which components work with your particular movement and case combination.
Pro Tip: Purchase a complete modding tool kit from reputable watch supply companies rather than assembling individual tools. Complete kits ensure compatibility between components and often include instructional materials.
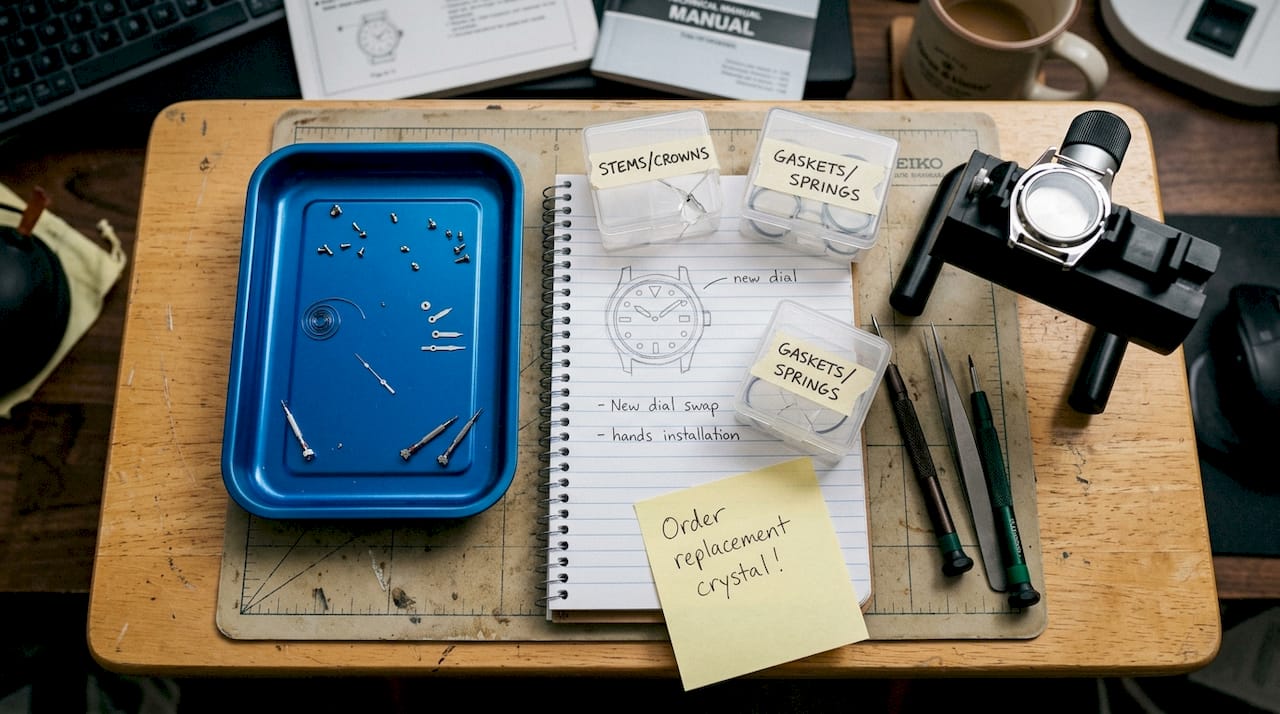
Supplementary materials enhance your modding success. Movement holders stabilize the caliber during work. Finger cots prevent oils from contaminating components. Cleaning solutions remove old lubricants. Rodico putty lifts dust particles without leaving residue. A loupe or magnifier helps inspect tiny parts for damage or contamination. These accessories might seem optional, but they dramatically improve your results and reduce frustration.
Preparing your workspace and watch for modding
Your workspace directly impacts modification success. A cluttered, poorly lit area leads to lost screws, contaminated movements, and damaged parts. Choose a dedicated space with bright overhead lighting supplemented by a desk lamp for close work. The surface should be stable, level, and covered with a soft mat or pad that prevents parts from rolling away.
Organization prevents the most common modding disasters. Small containers or magnetic parts trays keep screws, springs, and other tiny components separated and accessible. Label containers if working on multiple watches simultaneously. Position your tools within easy reach but outside the immediate work area to avoid accidental contact with delicate parts. A systematic layout reduces the chance of mixing up components or losing critical pieces.
Proper workspace preparation reduces errors and protects delicate watch components throughout the modification process. Static electricity poses a serious threat to modern watch movements, particularly those with electronic components. Ground yourself using an anti-static wrist strap connected to a proper ground point. Anti-static mats provide additional protection. Even mechanical movements can suffer from static-attracted dust particles that interfere with operation.
Before touching your watch, gather everything you need:
- All modding tools cleaned and inspected for damage
- Replacement parts verified for compatibility
- Cleaning materials and lubricants within reach
- Good lighting positioned to eliminate shadows
- Parts containers labeled and ready
- Camera or phone for documenting disassembly steps
Remove your watch’s bracelet or strap first using the spring bar tool. Work over your padded surface in case the watch slips. Store the bracelet separately to avoid scratches. Examine the case back to determine which opener type you need. Screw-down backs require a wrench-style opener that grips the notches, while snap backs need a knife tool inserted carefully between case and back.
Pro Tip: Take photos at each disassembly stage, especially before removing hands and when noting hand height positions. These reference images prove invaluable during reassembly when you can’t remember exact positioning.
Ensure your watch has stopped running before opening the case. Pull the crown to the time-setting position to halt the movement. This prevents the gear train from running during disassembly, which could cause damage if you need to manipulate components. Check that your hands are clean and dry. Even small amounts of skin oil can leave fingerprints on dials or crystals that are difficult to remove later.
Step-by-step guide to using Seiko modding tools
Modifying your Seiko requires patience and systematic execution. Rushing through steps or skipping procedures causes most modding failures. Follow this sequence for common modifications like dial and hand changes, the most popular customizations among enthusiasts.
-
Open the case back using your appropriate opener, applying steady pressure without forcing. Screw-down backs turn counterclockwise. Snap backs require careful prying at the designated slot.
-
Note the stem position and carefully pull it to release the movement. Some models require pressing a small release lever visible on the movement side.
-
Remove the movement from the case by gently lifting it out. Place it in a movement holder to stabilize it during work.
-
Position dial protectors over the dial surface, ensuring complete coverage. This critical step prevents scratches during the next phase.
-
Use hand removers to lift the seconds hand first, then minute hand, then hour hand. Apply even pressure directly above the hand pivot without touching the dial.
-
Remove the dial by loosening the dial feet screws or releasing the clips, depending on your movement type.
-
Install your new dial, ensuring the feet align properly with the movement holes. Secure it firmly but don’t overtighten.
-
Install new hands in reverse order: hour hand first, then minute hand, then seconds hand. Press each hand onto its respective post using a hand press or gentle pressure with a soft tool.
-
Verify hand clearance by manually rotating them through a full cycle. Hands should never touch each other, the dial, or the crystal.
-
Reinstall the movement into the case, align the stem, and secure the case back.
Following careful stepwise procedures avoids damage and ensures professional modding results that rival factory specifications. Different tools offer varying levels of control and ease of use for specific tasks.
| Task | Tool option A | Tool option B | Difficulty level |
|---|---|---|---|
| Hand removal | Lever-style remover | Presto-style remover | Intermediate |
| Case back opening | Ball opener | Knife opener | Beginner to intermediate |
| Crystal installation | Hand press | Arbor press | Advanced |
| Bezel removal | Adhesive removal | Bezel knife | Intermediate |
Pro Tip: Always use dial protectors before hand removal to avoid scratches. Even experienced modders occasionally slip, and dial damage is often irreparable.
Critical safety warning: Never force any component. If a screw won’t turn, a hand won’t lift, or a case won’t open, stop and reassess your approach. Forcing parts causes stripped threads, bent hands, cracked dials, and broken stems that transform a simple mod into an expensive repair.
Common errors plague novice modders but are easily avoided with awareness. Over-tightening case screws strips threads and can crack cases. Contaminating the movement with dust, fibers, or fingerprints causes timing issues and premature wear. Misaligning hands during installation creates clearance problems. Forgetting to test crown functions before final assembly means reopening the watch. Installing a crystal without proper seating compromises water resistance. Each mistake wastes time and potentially damages irreplaceable components.
Understanding the Seiko mod step-by-step guide helps you anticipate challenges before they occur. Practice hand installation on an inexpensive donor movement before attempting it on your primary project. The muscle memory and confidence you develop through practice prevent costly mistakes on your actual modification.
Troubleshooting common modding issues and verifying results
Even careful modders encounter problems. Recognizing issues quickly and knowing solutions separates successful projects from abandoned ones. Stripped screws result from using incorrect screwdriver sizes or applying excessive force. If you strip a screw head, try a rubber band between the screwdriver and screw for extra grip. Severely stripped screws may require professional extraction.
Scratched dials usually happen during hand removal when tools slip or dial protectors shift. Prevention is your only real option since dial refinishing rarely matches original finishes. If you do scratch a dial, assess whether the damage is visible during normal wear. Minor scratches near the edge might hide under the chapter ring or hands.
Improper hand alignment manifests as hands that touch each other, the dial, or the crystal. This happens when hands aren’t fully seated on their posts or when you install them at incorrect heights. Remove and reinstall the affected hands, ensuring each presses completely onto its post. Check clearance by manually rotating all hands through several complete cycles.
Loss of water resistance occurs when gaskets dry out, get damaged, or aren’t properly seated during reassembly. Replace case back gaskets whenever you open a watch. Apply a thin layer of silicone grease to gaskets before installation. Don’t assume your modified watch maintains its original water resistance rating without professional pressure testing.
Knowing common mistakes and how to fix them ensures satisfying modding outcomes that you’ll enjoy wearing for years. Quick verification checks before final assembly save you from having to reopen the watch:
- Rotate hands manually to verify clearance
- Check date change function if applicable
- Confirm crown pulls to all positions smoothly
- Inspect crystal for dust or fingerprints
- Verify chapter ring or bezel alignment
- Test stem security by gentle pulling
After reassembly, set the time and observe the watch for 24 hours. Listen for unusual noises that might indicate a problem. Check that the seconds hand sweeps smoothly without stuttering or stopping. Verify date changes occur at midnight, not noon. Test all crown positions to ensure proper function. Wind the watch fully and monitor whether it maintains accurate time over several days.
Water resistance testing requires specialized equipment. Watchmakers use pressure chambers that simulate underwater conditions without actually submerging the watch. Visual inspection of gaskets provides limited assurance. If water resistance matters for your intended use, invest in professional testing after any case opening. The cost of testing is minimal compared to water damage repair.
Patience prevents most modding disasters. If you feel rushed, frustrated, or tired, stop and return to the project later. Fatigue causes mistakes that careful planning would otherwise avoid. Understanding common Seiko modding issues before starting your project helps you anticipate challenges and prepare appropriate solutions.
Explore custom Seiko watches and modding services
While DIY modding offers incredible satisfaction, some enthusiasts prefer professionally crafted custom watches or need expert assistance for complex modifications. Ottoman Prieur specializes in custom Seiko modifications that combine your vision with professional execution. If you’ve enjoyed learning about modding tools and techniques but want to see what’s possible with expert craftsmanship, exploring professional options makes sense.

The Seiko mod configurator lets you design your ideal watch by selecting from curated combinations of dials, hands, bezels, and cases. Each configuration undergoes quality control to ensure compatibility and durability. For truly unique pieces beyond standard configurations, the custom watch request service brings your specific vision to reality with expert guidance throughout the design process.
Every custom piece from the Seiko mod store reflects the same attention to detail and precision you’ve learned about in this guide. Professional modders use the same fundamental techniques but bring years of experience that prevents common mistakes and ensures flawless results. Whether you’re building your first mod or your tenth, having access to quality parts and expert advice accelerates your journey from enthusiast to skilled customizer.
FAQ
What tools are absolutely essential for beginner Seiko modding?
Beginners need a case opener matched to their case back type, a quality hand remover set, dial protectors, precision screwdrivers, and a spring bar tool. These five tool categories handle most basic modifications like dial and hand swaps. Adding a movement holder and parts containers improves organization and safety. Start with these essentials before investing in specialized tools for advanced modifications.
How can you ensure the authenticity of Seiko parts for mods?
Purchase from established retailers or specialist sites featured in the genuine Seiko parts guide that verify authenticity. Check part numbers against official Seiko documentation before ordering. Genuine parts include proper markings and come with certificates of authenticity. Aftermarket parts vary in quality, so research manufacturer reputations through modding forums and communities before purchasing.
What are common mistakes to avoid when using modding tools on Seiko watches?
Avoid over-tightening screws, which strips threads and cracks cases. Never skip dial protection during hand removal, as even experienced modders occasionally slip. Working in dusty or fibrous environments contaminates movements and causes timing issues. Using incorrect tool sizes damages screw heads and case backs. Understanding Seiko modding mistakes to avoid prevents these common errors. Always use the right tool for each specific task and handle all components with gentle, deliberate movements.
How do you check if your Seiko watch still maintains water resistance after modding?
Professional pressure testing provides the only reliable verification of water resistance after opening a case. Watchmakers use specialized chambers that simulate underwater pressure without water contact. Visual gasket inspection offers limited assurance since invisible damage or improper seating compromises seals. Replace gaskets during every case opening and apply silicone grease before installation. Avoid water exposure until professional testing confirms your watch meets its rated resistance specification.
Recommended
- Seiko Watch Customization Guide: Build Your Unique Timepiece – Ottoman Prieur
- How to Mod a Seiko for Unique Custom Watches – Ottoman Prieur
- Seiko Mod Watch: Unlocking Your Custom Timepiece Potential - Ottoman – Ottoman Prieur
- 6 Must-Know Seiko Modding Essentials for Watch Customizers – Ottoman Prieur