Envío gratuito a todo el mundo: prueba sin compromiso durante 30 días.
Create Custom Seiko Dial: Avoid 40% Modding Mistakes

Creating your own custom Seiko dial sounds exciting until you face the frustration of ruined paint jobs, misaligned indexes, or damaged components. Nearly half of first-time Seiko dial modders damage their dials due to avoidable mistakes. This guide walks you through every step needed to create professional-quality custom dials affordably, helping you sidestep common pitfalls and achieve results you’ll be proud to wear.
Table of Contents
- Prerequisites: What You Need Before Starting
- Step-by-Step Guide to Customizing Your Seiko Dial
- Troubleshooting and Common Mistakes
- Safety Considerations and Warnings
- Alternative Approaches and Tradeoffs
- Expected Results and Outcomes
- Discover Custom-Built Seiko Mods at Ottoman Prieur
- FAQ
Key Takeaways
| Point | Details |
|---|---|
| Essential tools and materials | Quality brushes, dial presses, ESD gloves, and proper paints are non-negotiable for success. |
| Step-by-step technique matters | Multiple thin paint coats with proper drying periods prevent smudges and defects. |
| Common mistakes are preventable | Dust contamination and misalignment account for most failures but are easily avoided. |
| Alternative methods exist | Hydro-dipping offers speed while hand painting delivers unmatched detail and uniqueness. |
| Safety protects your investment | ESD protection and proper ventilation safeguard both components and your health. |
Prerequisites: What You Need Before Starting
Before touching your Seiko dial, gather the right tools and materials. Starting unprepared guarantees frustration and wasted money.
Your essential toolkit should include a dial remover, dial press, fine-tipped paintbrushes (sizes 00 to 2), ESD-safe gloves, anti-static mat, dust mask, magnifying loupe, and tweezers. Basic dial mod toolkits cost as low as $50, making this hobby accessible without breaking the bank. Quality matters more than quantity when selecting brushes. Cheap bristles shed and ruin your finish.
For materials, source a quality Seiko dial base compatible with your movement. NH35 and NH36 movements use standard 28.5mm dials. Paint selection depends on your vision. Enamel paints offer durability and shine but require longer drying times. Acrylic paints dry faster but need careful sealing. You’ll also need appropriate primer, clear coat, paint thinner, and cleaning solutions.
Pro Tip: Purchase a complete Seiko dial customization tools and materials kit initially rather than buying individual items. You’ll save money and ensure compatibility.
Your workspace matters enormously. A clean, dust-controlled environment prevents the contamination that ruins 60% of custom dial attempts. Use a dedicated area away from HVAC vents. Cover your work surface with a lint-free cloth. Keep all tools organized and within reach.

| Tool Category | Specific Items | Estimated Cost |
|---|---|---|
| Hand Tools | Dial remover, press, tweezers | $25-40 |
| Painting Supplies | Brushes, paints, thinner, sealer | $30-60 |
| Safety Equipment | ESD gloves, mask, anti-static mat | $15-25 |
| Precision Aids | Loupe, alignment jig | $20-35 |
Handle Seiko dial bases and components only with ESD gloves. Fingerprints contain oils that prevent paint adhesion. Static electricity can damage the delicate dial feet that secure it to the movement. Store all components in anti-static bags between work sessions.
Step-by-Step Guide to Customizing Your Seiko Dial
Now that you have your tools ready, follow this proven sequence to create your custom dial without costly mistakes.
Surface Preparation
- Remove the existing dial carefully using your dial remover tool, supporting the movement to prevent damage
- Clean the dial surface thoroughly with isopropyl alcohol and a lint-free cloth
- Allow complete drying for at least 30 minutes in a dust-free environment
- Apply a thin primer coat if painting over glossy surfaces or changing colors dramatically
- Let primer cure for the manufacturer-recommended time, typically 12-24 hours
Paint Application
Thin coats prevent the drips and uneven texture that plague rushed projects. Mix your paint to proper consistency, testing on scrap material first.
- Apply the first coat using light, even strokes from center to edge
- Allow each coat to dry completely before adding the next layer
- Build color depth gradually with 3-5 thin applications rather than 1-2 thick ones
- Maintain consistent brush pressure and overlap slightly with each stroke
- Work in a dust-free space with proper ventilation
Pro Tip: Check detailed Seiko dial customization steps for paint-specific drying times and application techniques.
Drying and Curing
Patience during drying prevents 80% of paint defects. Rushing this stage ruins otherwise perfect work.
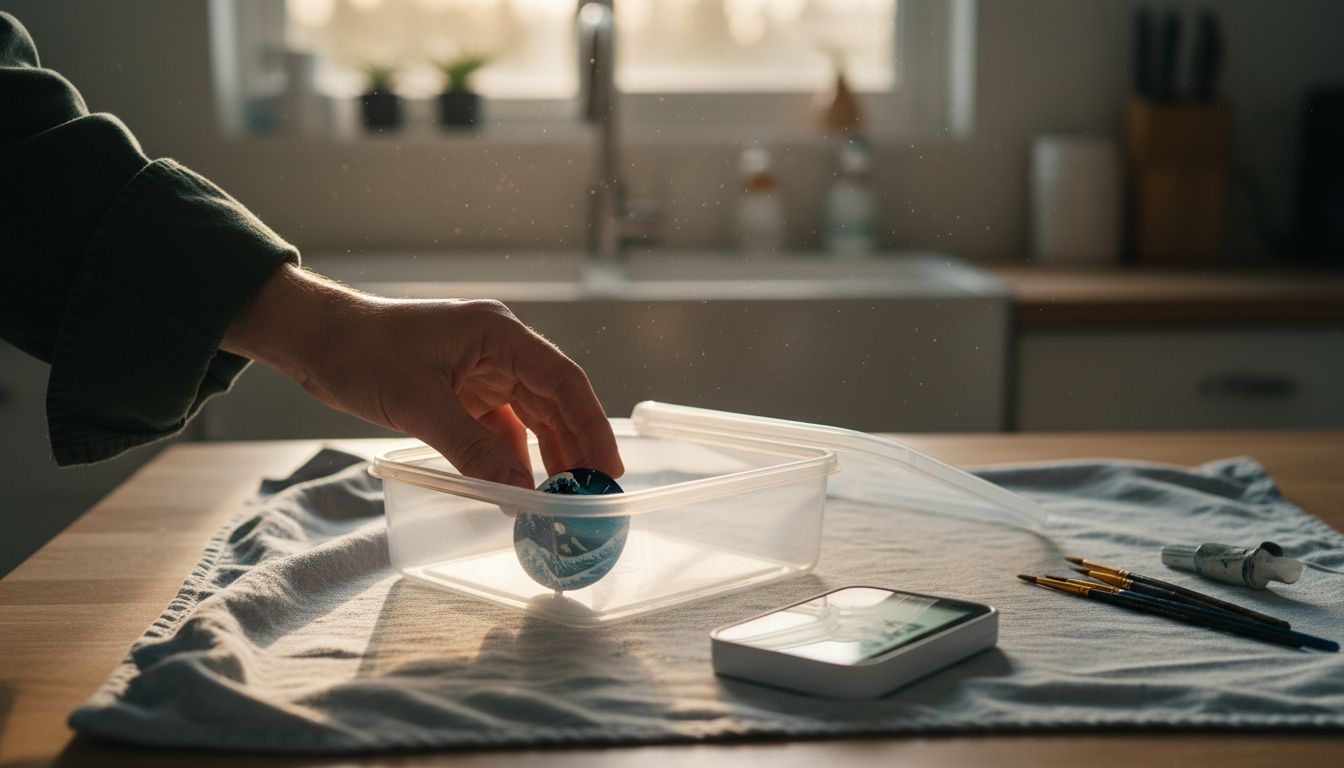
Place your dial in a clean, enclosed container like a plastic food storage box. This protects against dust while allowing air circulation. Maintain room temperature between 65-75°F. Avoid direct sunlight or heat sources that cause uneven curing. Allow minimum 24 hours between coats and 72 hours final cure time before handling.
Assembly and Alignment
Reassembling requires precision. Proper alignment reduces accidental damage or date wheel misfunction by over 60%. Position your dial over the movement, ensuring dial feet align perfectly with their corresponding holes. Use your dial press or gentle finger pressure to seat the dial completely flush.
Verify alignment by checking:
- Date window centers properly over the date wheel
- Hour markers align vertically when crown is at 12 o’clock
- Dial sits completely flat without gaps or tilting
- Hands clear the dial surface with proper spacing
Reference Seiko dial modding techniques for movement-specific alignment requirements. Some movements need specific orientation or spacer rings.
| Assembly Step | Key Check | Common Issue |
|---|---|---|
| Dial positioning | Feet alignment | Bent or broken feet |
| Pressing | Even pressure | Cracked dial or loose fit |
| Hand installation | Clearance gaps | Hands touching dial |
| Final inspection | Visual alignment | Rotated or tilted dial |
Test hand movement before closing the case. Rotate through full 24-hour cycle, verifying smooth operation. Check that hands don’t catch on dial texture or each other. Consult watch dial assembly and alignment resources if you encounter resistance.
Troubleshooting and Common Mistakes
Even experienced modders face challenges. Knowing how to fix problems saves your project.
Dust contamination appears as tiny bumps or specks in your finish. Prevention beats correction every time. Work in a bathroom after running hot water to settle airborne particles. Use a dust cover between coats. If contamination occurs, let the paint fully cure, then carefully sand with 2000-grit paper and recoat.
Misalignment during pressing happens when dial feet don’t seat properly. Never force a dial. If resistance occurs, remove the dial and inspect feet for bends or debris. Use a positioning jig or alignment tool to guide the dial straight down. Trying to correct after pressing often causes worse damage.
Pro Tip: Establish a dedicated clean workspace away from carpets, pets, and HVAC vents. This single change prevents more failures than any other precaution.
Dial index damage typically occurs during disassembly when tools slip. Always use properly sized tools that fit snugly. Support the dial from underneath when removing hands. Work slowly and apply steady pressure rather than sudden force.
ESD damage shows up as erratic or non-functional electronics. You won’t see it happening, making prevention essential. Always wear ESD gloves and work on an anti-static mat. Ground yourself before handling components.
Rushing drying times creates soft paint that smudges, poor adhesion that chips, or trapped solvents that cause bubbling. Follow manufacturer cure times religiously. Environmental factors like humidity and temperature affect drying, so add buffer time in non-ideal conditions.
“The difference between a professional-looking custom dial and an obvious amateur attempt comes down to patience and cleanliness. Skip neither.”
Review common Seiko modding mistakes and fixes for detailed troubleshooting guides specific to your issue.
Safety Considerations and Warnings
Protecting yourself and your components requires following basic safety protocols throughout your project.
ESD protection isn’t optional. Static electricity you can’t even feel destroys electronic components instantly. Wear ESD-safe gloves for all handling. Use an anti-static work mat connected to proper ground. Store components in anti-static bags. Even brief contact with unprotected hands can cause latent failures that appear weeks later.
Ventilation and respiratory protection matter when working with paints and solvents. Many enamel paints release harmful fumes during application and curing. Work in a well-ventilated area with fresh air circulation. Wear an appropriate respirator mask rated for organic vapors, not just a dust mask. Open windows and use fans to maintain airflow.
Proper tool use prevents both component damage and personal injury. Sharp tools like dial removers and tweezers can slip and cause cuts. Maintain firm grip and work deliberately. Never use excessive force. If something doesn’t move easily, reassess your approach rather than pushing harder.
Workspace setup affects safety significantly. Ensure adequate lighting to see fine details clearly. Organize tools to prevent reaching across your work area. Keep solvents and paints in sealed containers when not actively using them. Have cleanup materials readily available.
“Paint fumes and static electricity pose real risks. Proper ventilation and ESD protection aren’t suggestions, they’re requirements for safe dial customization.”
- Use chemical-resistant gloves when handling paints and thinners
- Keep fire extinguisher nearby when working with flammable solvents
- Dispose of paint-soaked materials in sealed metal containers
- Wash hands thoroughly after each work session
- Never eat or drink in your work area
Alternative Approaches and Tradeoffs
Hand painting isn’t your only option for custom dial creation. Understanding alternatives helps you choose the right method for your goals.
Hydro-dipping transfers printed patterns onto three-dimensional objects through water immersion. Hydro-dipping can reduce dial finishing time by up to 50%, but with less precise detail. You’ll achieve consistent patterns quickly, making it ideal for geometric designs or replicated textures. However, fine details and custom artwork suffer. The process requires specific equipment and can’t match hand-painted uniqueness.
Printed dials use high-resolution printing on dial blanks. This method excels for photographic images or complex graphics impossible to paint by hand. Quality printers produce sharp results, but the finish often looks flat compared to hand-applied paint layers. You’re also limited to designs you can create digitally.
Hand painting remains the gold standard for truly custom, one-of-a-kind dials. You control every aspect from color mixing to texture application. The learning curve is steeper and time investment higher, but results showcase genuine craftsmanship.
| Method | Speed | Cost | Skill Required | Uniqueness | Detail Quality |
|---|---|---|---|---|---|
| Hand Painting | Slow (3-7 days) | $80-150 | High | Maximum | Excellent |
| Hydro-Dipping | Fast (1-2 days) | $60-100 | Medium | Limited | Good |
| Printed Dials | Fast (1-2 days) | $50-120 | Low | Medium | Very Good |
Pros of Hand Painting:
- Complete creative control over every element
- Authentic artisan quality with visible craftsmanship
- Ability to blend colors and create gradients
- Unique finish impossible to replicate exactly
Cons of Hand Painting:
- Significant time investment including drying periods
- Requires steady hands and practice to master
- Higher failure rate for beginners
- Limited ability to create photorealistic images
Explore alternative Seiko dial customization methods to compare techniques in detail. Your choice depends on whether you prioritize speed, cost, uniqueness, or ease of execution.
Expected Results and Outcomes
Setting realistic expectations helps you plan effectively and measure success accurately.
Typical dial customization projects require 3-7 days from start to finish. This includes surface preparation, multiple paint coats with drying time between each, final curing, and careful assembly. Rushing any stage compromises quality. Plan for the upper end of this range if you’re new to the process or working in less-than-ideal environmental conditions.
Total costs generally range from $80 to $250 depending on tools and materials chosen. Your first project costs more because you’re acquiring tools. Subsequent projects drop to $30-60 for materials only. Buying quality tools initially saves money long term compared to replacing cheap versions that break or perform poorly.
Successful custom dials show these quality indicators:
- Smooth, even paint finish without visible brush strokes or texture variations
- Precise dial alignment with properly centered date window and vertical index markers
- No paint chipping, flaking, or adhesion failure after assembly and initial wearing
- Clear, crisp edges on any painted details or color transitions
- Proper clearance between hands and dial surface during full rotation
Balance quality expectations with budget realities. Professional custom dial services charge $200-500 because they have optimized processes and premium equipment. Your DIY version for under $100 won’t match commercial perfection, but it will reflect your personal vision and craftsmanship.
Your first attempt will likely have imperfections. That’s normal and expected. Each project improves your technique. Many modders create 3-4 practice dials before attempting their dream design. Consider this part of the learning investment rather than failure.
Discover Custom-Built Seiko Mods at Ottoman Prieur
Creating custom dials yourself builds valuable skills and personal connection to your timepiece. But sometimes you want professional results without the learning curve.
Ottoman Prieur offers expertly crafted custom-built Seiko watches that blend the affordability of Seiko movements with luxury styling. Each piece showcases the same attention to detail you’re learning to apply yourself, but with refined techniques perfected through hundreds of builds. From classic dress watches to bold sport designs, we create timepieces that express your individual style.

Explore our extensive catalog featuring personalized Seiko watch options you can configure to your exact preferences. Choose from premium dial designs, hand styles, case finishes, and strap combinations. Our configurator lets you visualize your creation before ordering. We also offer affordable luxury Seiko mods that deliver high-end aesthetics at accessible prices.
Whether you’re building your skills with our Seiko watch customization guide or ready to commission a professional custom piece, Ottoman Prieur supports your journey to unique timepiece ownership.
FAQ
How long does it typically take to create a custom Seiko dial?
Complete projects require 3-7 days including surface preparation, multiple paint coats, drying time between layers, final curing, and careful assembly. Rushing compromises quality, so plan for the upper end of this range.
Can beginners create professional-quality custom Seiko dials?
Yes, beginners can achieve excellent results by following detailed instructions, using proper tools, and practicing patience during drying stages. Your first attempt won’t be perfect, but quality improves significantly with each project.
What is the cost estimate for creating a custom dial?
Expect $80-250 for your first project including tools and materials. Subsequent dials cost only $30-60 for materials since you already own the necessary equipment.
Is hydro-dipping a good alternative to hand painting?
Hydro-dipping works well for geometric patterns and speeds production by 50%, but sacrifices fine detail and uniqueness compared to hand painting. Choose based on whether you prioritize speed or customization.
How critical is dial alignment during assembly?
Extremely critical, as proper alignment prevents damage and date wheel misfunction by over 60%. Misaligned dials cause hands to catch, date windows to display incorrectly, and potential movement damage.
What safety equipment is essential for dial customization?
ESD-safe gloves, anti-static mat, respirator mask rated for organic vapors, and proper ventilation are non-negotiable. These protect both you from paint fumes and your components from static damage.